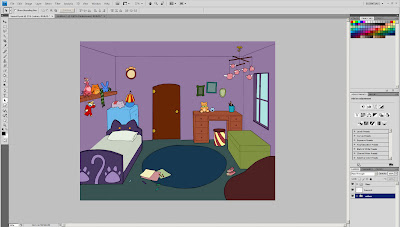
For quite some time, all of my colored background have only the indoors to show because I hadn't yet illustrated the outside. Well now there is one! This, surprisingly, took me a little longer to render than the average background. That's because this wasn't made as one image like the other backgrounds, but it's composed of separate layers that can be altered and moved around if I need to use them in other backgrounds.
Thursday, December 30, 2010
Tuesday, December 21, 2010
Winter Break. Winter, yes. Break, NO!!
The goal for winter break is to pound out the rest of the digital backgrounds in photoshop. So far 6 have been tackled.
And to help me work on my backgrounds is Miss Kitty the Filmmaking Productivity Calico. She keeps my lap warm and makes it difficult to leave my chair so I have no choice but to sit and work. I hope the rest of my classmates are staying warm and inspired. Whether you're relaxing or working, have a good break everyone!
Wednesday, December 15, 2010
End of the Fall Semester
Whoo boy, one semester of production down, one to go. I still plan on working over the 3 week winter break. In fact, I'll have to double my planned work load. I was just going to concentrate on coloring backgrounds but I'll also have to finish keying the remainder of the film too because I fell behind schedule. Looks like my Christmas vacation will be a working vacation.
Hopefully my current work reel for Dark Circus will be up here on the blog within a few days. I'm planning on asking my Sound Design professor if I can use a few tracks from his latest CD. So once I get his 'okay' I'll post the current work reel with the new audio.
Wednesday, December 8, 2010
I have an assistant! Homin Jang joins the Dark Circus Team
Monday, December 6, 2010
Shot 35 and 36 Keys
Completion of keys in the second scene is so close I can taste it. There is still many more shots to key frame so I shall leave you with a few of the most recent shots I've down. I have 2 weeks left in the semester to get as much done as possible. Oh the madness!
Shot 35 Keys
"Macey on the Delivery Dock"
Shot 36 Keys
"Leaping to work"
Sunday, December 5, 2010
Wednesday, December 1, 2010
Keyin' Like a Crazy Person
Shot 20 key frame test
As far as how much is done with keyframing, the first two scenes are as stands:
Scene 1 (Macey's Bedroom at sunrise): Keys completed
Scene 2: (Family in the Bakery): Keys 80% done
I'll have some more tests up here on the blog soon once I get them all shot and rendered to video. Finals are creeping up on me but I'll do my best to keep the updates rolling. Speaking of updates, it's snowing! I'm surprised that we didn't really see any until the first day of December. I love snow, it puts me in a working mood and makes coffee taste even better. Also, the fall semester ends on December 18, which means that the school year is almost half over. In a rush to get as much done before winter break as possible, the goals for the next few weeks are:
- Key Frames for Scenes 1-4
- Updated Work Reel
- Theater Promo Poster
- Artist Statement
- Artist Bio
Wish me luck!
Sunday, November 14, 2010
So I Lied: MORE BACKGROUNDS!!
The Culprits!!
Baby Cat (upper left), Stubbins (in the box), Miss Kitty (lower right)
Tuesday, November 9, 2010
Someone's in the Kitchen With Erin
Fresh out of the out of the oven are some backgrounds from the kitchen scene. Don't they look tasty? These are some of the last ones I'll do for until winter break because now it's time to focus on key framing for the remainder of the semester. I'll wrap up the few backgrounds I already have started and then pick back up on the rest of them once school is dismissed for winter break.
Shot 31 background
Shot 32 background
Monday, November 8, 2010
Progress Charting
I finally found a use for Microsoft Excel other than making silly pie charts. I made a table listing off all the shots and what work needs to be done. I have them color blocked according to what's done, what's not, what's started, etc. When this whole thing turns blue and black, then that means that the film is done. Hmmm, I recall a friend of mine saying that life is all about filling progress bars..
Wednesday, November 3, 2010
The Background Coloring Process
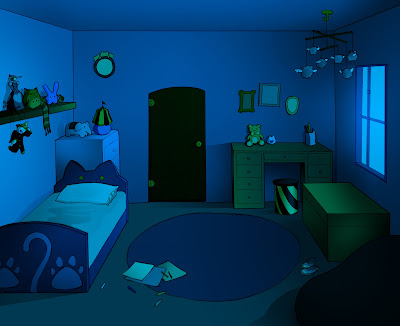
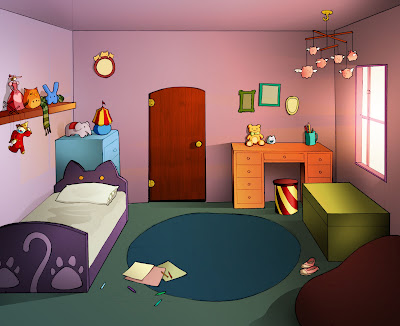
I've spent a lot of time focusing on the backgrounds lately. I guess I want to get a good chunk of them done before winter break. One thing that I have to think about when I'm coloring these backgrounds of the bedroom is that some of these drawings are seen more than once in the film and at different times of the day. This bedroom shot for example is seen at sunrise and at night.
In this post, I'll give a little insight onto my process for coloring these backgrounds.
Morning Lighting
Night Lighting
First I scan my layout drawing into photoshop at 300 dpi. Because I am atrociously slow and doing linework in photoshop, I like to do all my clean line drawing right there on the layout.
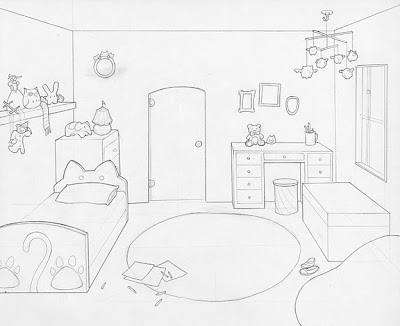
In order to refine the lines a little more, adjust the levels settings. This controls what photoshop determines is true white and what is true dark. This helps eliminate some ghosts of erased lines and any paper textures that seeped in through the scan.
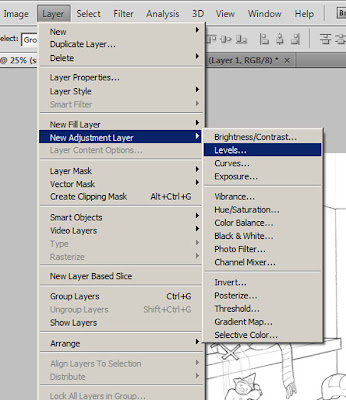
Now that the drawing is all pretty and clean. It's ready for coloring. But first.....
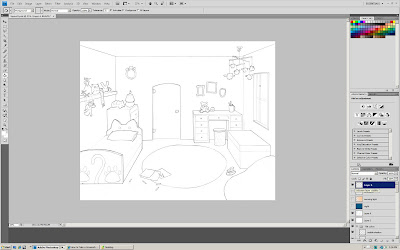
Before I touch my drawing with any color, I need to set the layer compositing mode. I'm using Linear Burn for this drawing because I need the lines to be able to show through the flat color. Compositing modes such as Linear Burn, Color Burn, and Multiply drop the lights from an image (in this case, the white parts of the drawing) and leaves the dark lines in full view. This way, I just create new layers to color on underneath the line drawing layer.
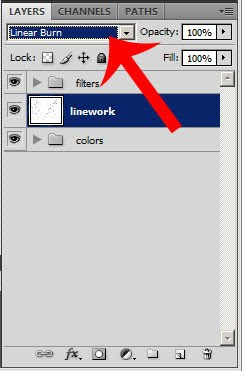
Flat color the drawing. To me, this is actually the most time consuming part of the coloring process just because I'm always messing around with my color choices.
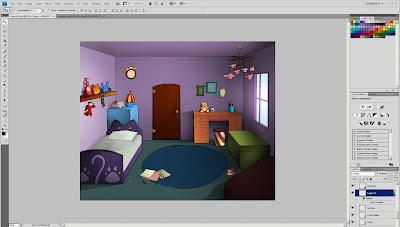
Gradient time! I love drawing with gradients. With the exception of a few touches here and there with the bruch tool, this whole room was rendered with different gradients. Sometimes that means selecting an object, creating a new layer, applying a few gradients to that selection, and changing the compositing mode of the gradient layer just for the shadows alone. There are also gradients for highlights, reflected lights, and cast shadows.
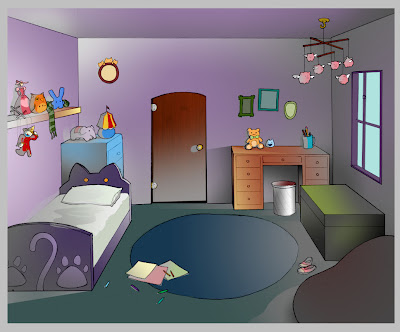
If I were to set all the compositing modes on the layers back to normal, this is what the background would look like. The reason that I shade with value tones like grays and blacks instead of colors is because if I change my mind about a certain color, I can just change the flat color layer and leave the shading layers alone.
Now that all the colors and values are in place, it's ready to see a little sunshine. This shot is first views in the beginning of the film during sunrise, so it needs a pinky-orange cast to it. By laying a peach colored gradient leading away from the window and setting the compositing mode to Overlay, I get a warm morning glow. A few orange sunbeams are dropped in too.
It's a similar process for the nighttime shot. But instead of just a gradient on half the screen, it's a full fill color dropped right over the whole drawing and then setting the compositing mode to Hard Light.
Sunday, October 31, 2010
Art Display! Hurray, Hurray!
Student work, ahoy! For the last few weeks, some concept and production artwork from Dark Circus as well as some work from my anatomy studio class have been hanging around on the Wall of Winn for all to see. Also gracing the wall is some work from the super talented Kevin Ingrassia, who is working on a 3D game design called The Locker for his senior thesis project. I don't know how much longer it will be up there, so to all you CCSers, go take a look if you haven't gone to see it yet!
Kevin and I divided the Wall of Winn 50/50. It was interesting to see work for a traditional film and a CG game juxaposed beside eachother.
Kevin's awesome art
Labels:
concept art,
exhibition,
Living and Working,
promotion
Monday, October 18, 2010
Thursday, October 14, 2010
Character Line Up and Macey Orthos
Monday, October 11, 2010
Getting Colorful: Starting the Backgrounds
So I was up all night messing around in Photoshop and trying to work out some color ideas for my backgrounds and I came up with something like this. I am a gradient fiend and can't seem to do much rendering without them, but I also want to pull in some illustrated techniques into it too. This is the most complicated background in my film so hopefully all the rest of the backgrounds will go much faster once I have an established rendering style for them. Fellow filmmakers, please share your input. I really appreciate it.
Fully Rendered
Line work from Layout drawing
Sunday, October 10, 2010
The Colors of Autumn
Saturday, October 9, 2010
Background Layouts Complete! Another Checkpoint Reached!
To no one's surprise, it's 4 in the morning and I am all tuckered out. Time for bed. Hmmm, i'm getting a strange sense of dejavu. Wait a minute, does this picture seem familiar?
Oh yeah, that's because the same thing happened with my last film from junior year.
Friday, October 8, 2010
Some Things You Can Find On My Desk
My work space in the dorm definitely wouldn't be getting any standing ovations for organization or overall prettiness, but it's my zone of amazing creative brain explosions! There are typically anywhere from one to four beverages sitting around somewhere and drawing utensils scattered everywhere. Tonight on this fine evening of drawing layouts, my lowly desk is graced by the divine presence of strawberry cheesecake ice cream. Whoohoo!!
It was so delicious!
Tuesday, October 5, 2010
Layouts hit the 2 Minute Mark
Where most layouts end, mine keep going. The first two minutes of the film have all their respective layouts complete. I've been having a lot of fun drawing these layouts, especially more detailed ones like the shot below. I'll keep chugging along and crankin' these bad boys out as fast as I can because I need to get started on coloring them for backgrounds as well as beginning the key animation.
Layout drawing from Shot 37
Saturday, October 2, 2010
Inspirations for the Bakery
Subscribe to:
Posts (Atom)